Clearing the Air on Roof Repairs and Replacements: Facts Every Homeowner Should Know
Introduction
Roofing is often misunderstood, with myths leading to poor decisions and expensive consequences. As experienced professionals in the roofing industry, we aim to shed light on widespread misconceptions and present a detailed, expert-backed guide that empowers homeowners to make informed decisions. If you’re searching for reliable insights on roofing in Denver, you’re in the right place.
Myth: Roof Repairs Are Simple DIY Jobs
Climbing onto your roof with a toolkit might seem cost-effective, but roofing repairs are not weekend warrior projects. Professionals undergo rigorous training to identify damage patterns, assess underlying issues, and ensure structural integrity. What appears to be a minor leak could mask water intrusion beneath shingles or even damage to the decking. Improper DIY repairs not only risk injury and further damage but can also void your manufacturer’s warranty and insurance coverage.
Why Professional Assessment Matters
- Hidden damage: Water damage often spreads under visible surfaces.
- Material compatibility: Using the wrong nails, flashing, or sealants can compromise longevity.
- Building code compliance: Only certified professionals can guarantee your roof meets Denver’s specific roofing codes.
Misconception: A New Roof Doesn’t Require Maintenance
Many homeowners assume that a brand-new roof means they can forget about it for 20+ years. This misconception leads to premature degradation, even on the most durable materials.
The Truth About Roof Maintenance
- Seasonal inspections can identify wind, hail, or UV damage early.
- Cleaning gutters and downspouts prevents water pooling and ice damming.
- Re-sealing flashing around vents and chimneys preserves waterproofing.
Routine maintenance is not just preventative—it’s also a requirement for many roofing warranties to remain valid.
False Belief: All Roofing Materials Perform the Same
Choosing a roofing material isn’t simply about budget or appearance. Each material has distinct performance attributes that impact energy efficiency, resistance to weather, lifespan, and insurance costs.
Material Comparison Highlights
| Material | Lifespan | Pros | Cons |
| Asphalt Shingles | 15-30 yrs | Affordable, versatile | Prone to storm damage |
| Metal | 40-70 yrs | Energy-efficient, durable | Higher upfront cost |
| Tile | 50-100 yrs | Fire-resistant, elegant aesthetics | Heavy, requires reinforced framing |
| Slate | 75-150 yrs | Extremely durable, eco-friendly | Expensive and labor-intensive |
Your roofing material should match your climate, home design, and budget. For roofing in Denver, factors like snow load and freeze-thaw cycles must be considered.
Wrong Assumption: Roof Repairs and Replacements Are Overpriced
Roofing is often mistakenly seen as an overpriced service. However, high-quality roofing is an investment, not an expense. Professional roofers offer expertise, licensing, liability coverage, and often, warranties that protect your home long-term.
What You’re Really Paying For
- Skilled labor with years of safety and installation experience.
- High-grade materials built to withstand Denver’s climate.
- Detailed workmanship that ensures every shingle, seam, and nail contributes to your roof’s lifespan.
The upfront cost of quality roofing often offsets future repairs, water damage mitigation, and energy inefficiencies.
Myth: Homeowner’s Insurance Covers Every Roofing Issue
Insurance policies do not cover all types of roof damage, especially those stemming from negligence or normal wear and tear. Many homeowners are shocked when their claim is denied because their roof was poorly maintained or aged past its expected life span.
What Insurance Typically Covers
- Covered: Sudden damage from hail, wind, fire, or falling objects.
- Not Covered: Leaks from old age, neglect, poor maintenance, or incorrect installation.
Homeowners should schedule annual inspections, maintain records, and address minor issues promptly. Being proactive may also strengthen your case during a claims dispute.
Overlooked Truth: Roof Replacement Timing Matters
Many delay roof replacements until visible signs—like missing shingles or ceiling leaks—emerge. Waiting too long can increase costs dramatically.
Signs It’s Time for a New Roof
- Shingles are curling, cracking, or missing.
- Granules are collecting in gutters.
- Light is visible in the attic.
- Your roof is over 20 years old and was installed with older materials.
Replacing a failing roof before it deteriorates entirely can save thousands in interior damage, mold remediation, and emergency repairs.
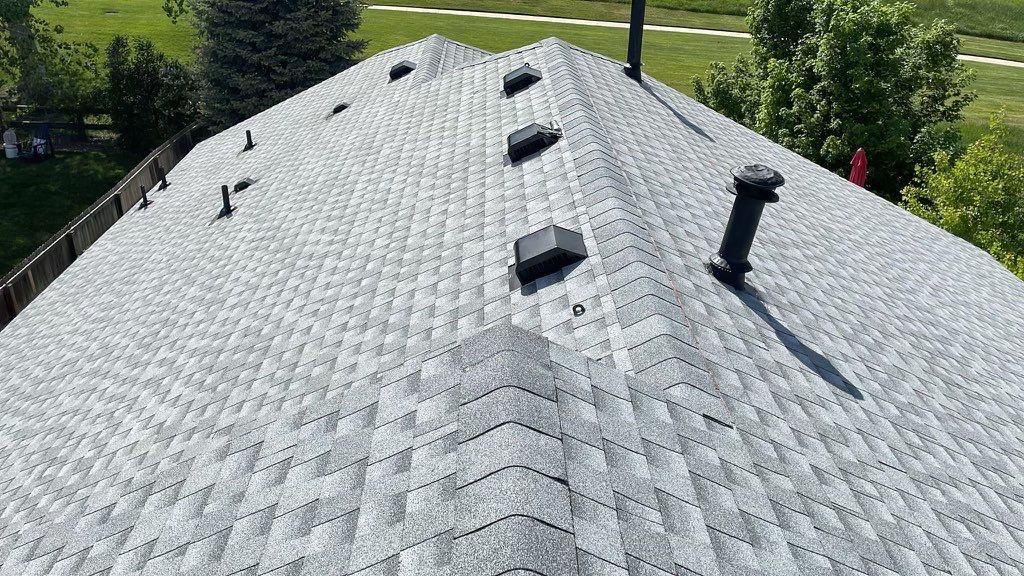
Ignored Factor: Ventilation and Insulation Are Roofing Essentials
The most overlooked aspect of roofing is what happens beneath the shingles. Ventilation and attic insulation affect everything from temperature regulation to roof lifespan.
Why This Matters in Denver
- Poor ventilation can lead to condensation, mold, and warped decking.
- Improper insulation causes ice dams, increasing the risk of leaks during snow season.
When evaluating roofers in Denver, prioritize those who understand the full roof system—including airflow dynamics and attic conditions.
One-Time Fixes Rarely Solve Long-Term Problems
Many companies offer patch jobs that “solve” the issue for a few weeks or months. These are often short-sighted solutions that don’t address the root cause.
Choose Long-Term Value
Partnering with a reputable roofing company in Denver means the issue is fully evaluated and addressed, not just hidden. Tried and True Roofing, based in Denver, Colorado, exemplifies this approach—providing in-depth assessments and complete, lasting repairs.
Unlicensed Contractors Are a Costly Gamble
Hiring unlicensed or uninsured roofers may save money upfront but exposes homeowners to serious legal and financial liabilities.
Risks of Hiring Unlicensed Roofers
- No protection from poor workmanship
- No liability coverage for on-site injuries
- No guarantees for compliance with Denver building codes
Always confirm licensure, insurance, and local references before trusting someone with your roof.
CONCLUSION
Making the right decision for your roof begins with understanding the facts—not the myths. A well-informed homeowner avoids costly pitfalls, extends the lifespan of their roof, and ensures the safety of their home. As demand grows for professional, high-quality roofing in Denver, it’s crucial to choose a partner who combines expertise, transparency, and accountability.
Whether you’re considering repair or full replacement, trust the process to experienced Denver roofers who understand the climate, materials, and construction standards unique to our region.
Clearing the Air on Roof Repairs and Replacements: Facts Every Homeowner Should Know Read More »