January 2026

Roofing Insurance Payouts: What Homeowners Need to Know Before Depositing the Check

When a storm damages your roof, your first instinct may be to call your insurance company and start the claims process. But when that insurance check arrives in the mail, should you deposit it right away? The answer is often no. Understanding how roofing insurance claims and payments work can save you from costly financial missteps and protect the integrity of your home repair project.

How the Roofing Insurance Claim Process Really Works

Insurance providers follow a fairly standardized process when it comes to residential roof damage claims. After you file a claim, the insurer assigns an adjuster to inspect the damage and determine the appropriate coverage. If approved, payments typically come in two or more installments. The initial payment, commonly referred to as the Actual Cash Value (ACV), reflects the roof’s current value after accounting for depreciation. The remaining funds—called Recoverable Depreciation—are only released once the work is completed and invoiced. This structure ensures the funds are used specifically for roofing repairs and not diverted elsewhere.

Why You Should Wait Before Depositing the Insurance Check

It’s tempting to cash the check as soon as it arrives, especially after the stress of storm damage and the hassle of filing a claim. But holding off is the smartest move. Depositing the check too early can lead to overspending, misallocation of funds, or even accidental use of money earmarked for roof repairs. Some homeowners unknowingly spend part of their insurance payout on unrelated expenses, only to discover they’re short when it’s time to pay the contractor. The best practice is to store the check securely—untouched—until you’re ready to pay your roofing contractor in full.

Start With a Roofing Contractor, Not Your Insurer

Many homeowners make the mistake of calling their insurance company before speaking to a roofer. However, initiating a claim prematurely—especially when the damage might not meet the deductible—can come back to haunt you. Even if the claim is denied, it still goes on your insurance record and may lead to higher premiums in the future. Always consult with a trusted roofing contractor first. A reputable contractor can assess the damage, document it thoroughly, and advise whether filing a claim is in your best interest. Their guidance can prevent unnecessary claims, protect your insurance rating, and ensure you approach the process strategically.

Understanding the Insurance Adjuster’s Role

Your insurance adjuster is there to represent the interests of the insurance company—not you. While they may seem cooperative, their job is to limit the insurer’s liability. That’s why it’s crucial to have your roofing contractor present during the inspection or to submit a scope of work that fully reflects local code requirements and industry standards. Experienced roofing contractors will advocate on your behalf, ensuring that all necessary repairs, including code-mandated upgrades, are included in the claim and properly compensated.

Depositing the Check: What Can Go Wrong

Many homeowners assume that once the check is in hand, the hard part is over. But cashing that check too soon can lead to several issues. Some banks may place a hold on large insurance checks, tying up your funds longer than expected. Worse yet, if the claim involves mortgage company endorsement, additional signatures may be required before the check can be cashed or used. And if the funds are partially spent before the roofing contractor is paid, you could end up short—leading to disputes, project delays, or personal out-of-pocket expenses. For these reasons, do not cash the check until you’ve reviewed it with your roofing contractor and confirmed all project timelines and costs.

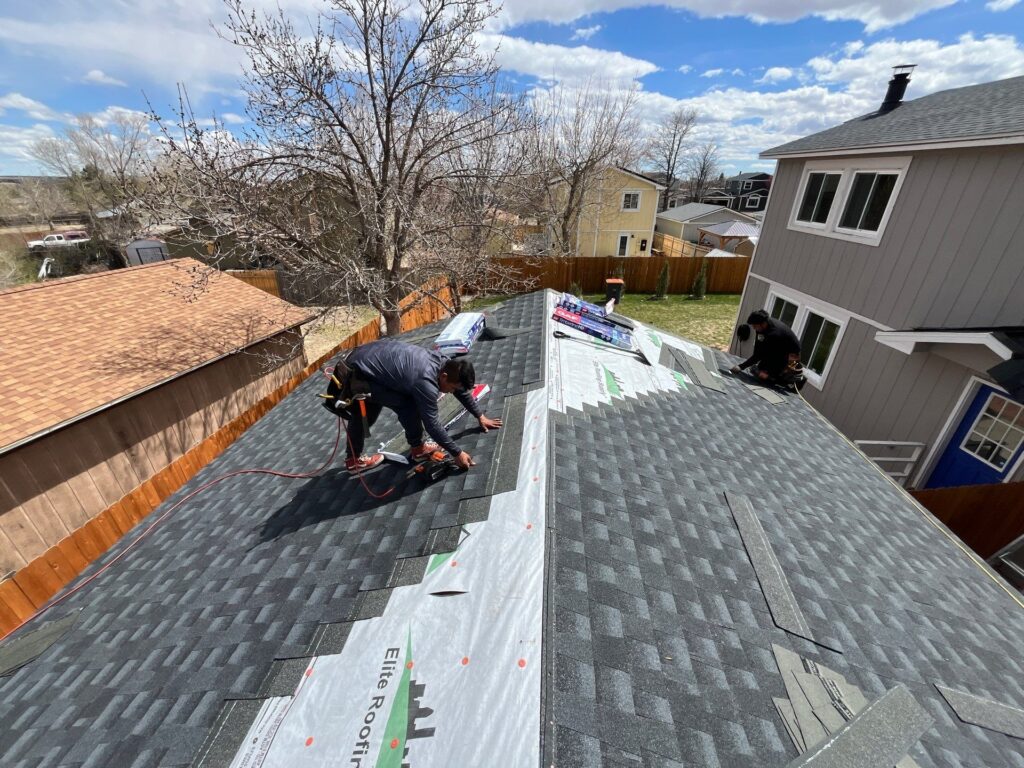
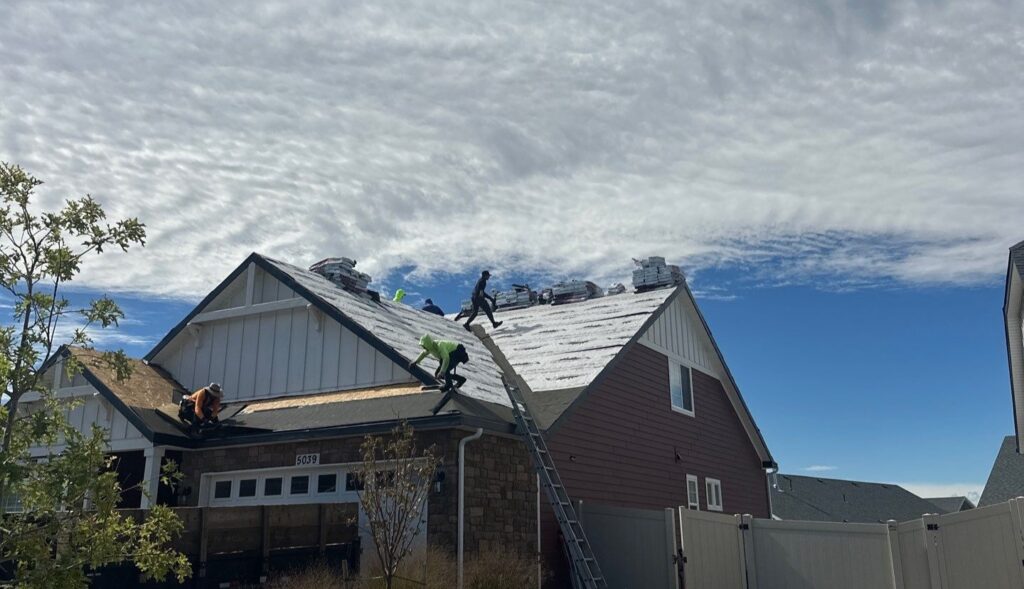
How Reputable Roofing Contractors Handle the Process

High-quality roofing companies understand the insurance claims process from start to finish. They work closely with homeowners and insurers to ensure fair compensation and timely repairs. From inspecting the roof and documenting damage to providing detailed estimates and negotiating with the insurance company, the contractor’s role is essential to maximizing your claim. Companies like Tried and True Roofing, located in Denver, CO, offer expert support throughout the insurance claim process and ensure homeowners never face the system alone. Their transparency and experience make them a dependable partner in navigating claim approvals, supplements, and disbursements.

The Importance of Insurance Supplements

In many cases, the initial insurance payout doesn’t cover the full cost of required repairs. Whether it’s code upgrades, structural concerns, or hidden damage, supplemental claims—known as insurance supplements—are common. Experienced contractors submit detailed documentation to justify these additional costs, ensuring homeowners are not left footing the bill. Without these supplements, you may receive insufficient funds, compromising the quality or completeness of the repair.

Timing Is Everything

Even if the funds are sufficient, timing matters. Most roofing contractors won’t begin work until the initial check is secured, and insurers won’t release depreciation until the work is complete. Coordinating these steps is critical. Keep your check secure, stay in close contact with your roofing contractor, and ensure that you follow their payment guidance precisely. A misstep in timing can delay your project or create unnecessary confusion with your insurance provider.

Key Takeaways Before You File or Deposit

  • Consult a contractor first to confirm whether a claim is worthwhile.
  • Do not deposit the insurance check prematurely; hold it until payment is due.
  • Know your deductible and ensure the damage exceeds that threshold.
  • Understand the full project scope including code upgrades and material costs.
  • Partner with a contractor experienced in insurance negotiations and supplement processing.

Conclusion

Filing a roof insurance claim is not as simple as calling your provider and cashing a check. Strategic planning, the right contractor, and disciplined financial handling are essential for a smooth process and full reimbursement. Always hold onto your insurance payout until the roofing project is complete and your contractor is ready for payment. This approach ensures transparency, accountability, and protection from common financial pitfalls. Take the time to do it right—because peace of mind starts with a secure roof and a smart plan.

Roofing Insurance Payouts: What Homeowners Need to Know Before Depositing the Check Read More »

Roofing Permits in Denver: Who Should Handle the Cost and Application?

A successful roof replacement in Denver begins long before the first shingle is removed. One critical—but often overlooked—step is securing the proper roofing permits. For homeowners comparing roofing contractors, understanding who is responsible for pulling and paying for the permit is essential. Missteps in this area can lead to delays, code violations, and financial surprises that compromise the success of your project.

Is a Permit Required for Roof Replacement in Denver?

Yes, the City and County of Denver requires a roofing permit before beginning any residential or commercial roof replacement. The permit ensures that work complies with local building codes, safety standards, and fire-resistance regulations. Projects started without a permit can be stopped by city inspectors, fined, or required to be redone entirely. Homeowners should never assume a contractor is handling the permit unless explicitly stated in the contract. Permitting is not optional—it is a legal requirement tied to inspections, insurance approvals, and resale compliance.

Who Should Pay for the Roofing Permit?

The responsibility for permit payment depends on how the project is being funded. In both scenarios—insurance-covered or out-of-pocket—the cost of the permit is ultimately passed on to the homeowner. However, the difference lies in how the process is handled.

1. Insurance Claim Projects

When a roofing replacement is funded through an insurance claim, the permit cost should be itemized in the contractor’s estimate and submitted as part of the insurance supplement. Your insurer is expected to cover the permit fee because it is a necessary component of the total project cost. A reputable roofing contractor will coordinate this submission, pay the permit upfront, and recover the cost from the insurance payout.

2. Cash-Funded Projects

If you’re paying for the roof yourself, the permit cost should still be included in your contractor’s bid. However, it is the contractor—not the homeowner—who should handle the permit application and fees. The fee is typically embedded into the final contract amount, making it a seamless process for the homeowner.

Warning Signs: When to Be Cautious

Not all contractors handle permits ethically or correctly. If a roofing company instructs the homeowner to apply for or pay for the permit directly, this can be a major red flag. It may suggest the contractor is unlicensed, unfamiliar with Denver regulations, or attempting to bypass legal accountability. In such cases, the homeowner may become liable for code violations or unfinished inspections. A qualified, licensed roofer should always manage the permitting process on your behalf, ensuring compliance with all municipal rules.

Denver’s Roofing Permit Requirements Every Homeowner Should Know

  • A permit is mandatory for all roof replacements in Denver, regardless of funding source.
  • Roofing materials may need to meet specific fire-resistance standards based on location and slope.
  • For roofs with a slope less than 4:12, additional moisture barriers or application techniques may be required.
  • Some HOAs may impose stricter rules on color, material type, or style. Failure to obtain HOA approval can result in forced tear-offs, added costs, or legal challenges.
  • Permits must be closed with a final inspection once work is complete. Unclosed permits can delay home sales or refinancing.

The Permit Process: What It Should Look Like

A professional contractor will include the permit process as part of their project workflow. This typically includes:

  • Verifying HOA requirements prior to submission
  • Filing the permit application with Denver’s Building Department
  • Paying the necessary municipal fees
  • Scheduling inspections during and after the project
  • Providing documentation to the homeowner for future records
    This integrated approach helps avoid compliance issues and builds homeowner confidence.

Why You Should Never Pull Your Own Permit

Some roofing companies may ask the homeowner to pull the permit themselves, under the guise of saving money or speeding up the process. This is not just unethical—it’s dangerous. When a homeowner pulls the permit, they accept legal responsibility for the entire project. This includes any code violations, accidents, or failures that occur. If the project does not pass inspection, it becomes the homeowner’s problem, not the contractor’s. Working with a licensed professional who handles permitting protects your investment and ensures accountability throughout the project.

Vetting Your Roofing Contractor for Permit Handling

Before signing any contract, ask direct questions about how the permit will be managed. These include:

  • Will your company apply for and pay for the roofing permit?
  • Is the permit fee included in the bid or listed as a separate line item?
  • How familiar are you with Denver Building Department’s guidelines?
  • Will I receive proof of the permit and documentation after project completion?
  • How do you coordinate inspections to ensure the permit is closed properly?
    Contractors who hesitate, deflect, or place responsibility on the homeowner are best avoided. Transparency and permitting expertise should be non-negotiable traits when selecting a roofing company.

Local Knowledge Matters

Roofing permit rules vary widely by city, and Denver is known for its strict building codes—especially related to roofing materials, insulation, and weather resistance. A company that has worked extensively in Denver will already understand the nuances of the permitting process and be prepared to meet those expectations without burdening the homeowner. For example, Tried and True Roofing, serving the Denver metro area, integrates local code compliance and permit management into every project, removing complexity and risk from the homeowner’s plate.

Don’t Let Permits Be an Afterthought

Permits may seem like a bureaucratic technicality, but they directly affect your project’s legality, safety, and resale value. A project done without a permit can halt a home sale or disqualify an insurance claim. The permit process should be clearly spelled out before the work begins, not added as a surprise after the fact. Insist that your contractor explains their process and includes all costs upfront. A trustworthy company is always transparent.

Conclusion

Roofing permits are not optional in Denver, and their handling should never fall on the homeowner’s shoulders. Whether your roof replacement is covered by insurance or self-funded, the contractor you choose should apply for, pay, and manage the permit process from start to finish. Protect yourself from liability, delays, and costly mistakes by partnering with a licensed, experienced contractor who views permitting as part of their professional responsibility—not yours.

Roofing Permits in Denver: Who Should Handle the Cost and Application? Read More »

Frequent Mistakes to Avoid During Asphalt Shingle Replacement

Asphalt shingles are among the most popular roofing materials in residential construction thanks to their cost-effectiveness, long-lasting performance, and straightforward installation process. Whether addressing localized storm damage or replacing weathered shingles, homeowners often consider performing minor asphalt shingle replacements themselves. While this can be a manageable DIY task for experienced individuals, the process involves precision and care. A single mistake during shingle replacement can expose your home to leaks, structural damage, and additional repair costs. Avoiding common errors is essential to ensuring a long-lasting and secure roof system.

Removing Shingles Without Damaging the Surrounding Area

One of the most frequent mistakes during shingle replacement is damaging the neighboring shingles during removal. Asphalt shingles are layered in an interlocking design and secured with nails. Ripping out a damaged shingle too quickly can crack, bend, or unseal nearby shingles. This compromises their effectiveness and may lead to additional replacements that were initially unnecessary. We recommend carefully lifting the overlapping shingles above the damaged section using a flat pry bar, gently loosening the adhesive strip without tearing the material. Precision at this stage will minimize collateral damage and reduce your workload.

Failing to Extract the Entire Shingle

Partial removal of a damaged shingle may seem like a shortcut, but this mistake leads to structural weakness. Leaving behind fragments of the old shingle can prevent the new one from aligning flush with the roof deck. This misalignment affects nail placement, weakens water barriers, and increases the risk of uplift from high winds. We advise removing the complete shingle, including all underlying nails and adhesive residue. Doing so ensures the replacement lies flat, is properly secured, and maintains the integrity of the entire shingle system.

Ignoring the Importance of Sealing Nail Holes

After installing a new shingle, every exposed nail hole must be sealed properly. This is a critical step that DIYers often overlook. Asphalt shingles are water-shedding by design, not waterproof. When nail holes are left unsealed, they become entry points for moisture, especially during rain or snow. This moisture can seep through the underlayment and lead to rot in the roof decking, mold growth, and insulation degradation. We recommend using roofing cement or mastic to seal each exposed fastener, creating a watertight barrier that extends the life of your roofing system.

Forgetting to Re-Nail Overlapping Shingles

Replacing one or two shingles often requires loosening or temporarily lifting the surrounding shingles to gain access to the damaged area. This process frequently involves removing nails that secure those adjacent shingles. A common oversight occurs when those nails are not replaced after the repair. As a result, the overlapping shingles become loose and vulnerable to wind uplift, leaving gaps that allow water intrusion. After completing your repair, ensure all previously removed nails are reinstalled and sealed. Re-adhering the overlapping shingles with roofing cement restores the roof’s wind resistance and structural continuity.

Not Applying Mastic to the New and Adjacent Shingles

Nails alone do not keep shingles in place. Modern roofing systems rely on a combination of fasteners and adhesive bonding to create wind-resistant and watertight protection. Once a shingle has been nailed into position, mastic or roofing adhesive must be applied to the edges to bond it to the underlying layer. This seal helps prevent wind from lifting the edge of the shingle and creating a point of failure. Failing to re-seal both the replacement and surrounding shingles is one of the most common DIY mistakes. We strongly recommend applying a small bead of mastic under each edge and pressing firmly to ensure proper adhesion.

Overestimating DIY Capability on Large Repairs

Replacing a single shingle or small patch is typically manageable for a skilled homeowner. However, problems arise when attempting to DIY a repair that exceeds your ability. If your roof has widespread damage, signs of underlayment deterioration, or soft spots indicating wood rot, the repair may require more than a surface fix. Attempting to cover these issues with fresh shingles only masks the problem and leads to greater expense down the road. In such cases, a professional evaluation is necessary to ensure the problem is addressed holistically. Reputable contractors, such as Tried and True Roofing in Denver, CO, can provide expert diagnostics and quality repairs that meet code requirements and manufacturer specifications.

When to Leave It to Professionals

Roofing involves more than just laying shingles. It requires technical understanding of slope, drainage, flashing details, ventilation, and product compatibility. If your project involves steep slopes, two-story access, or spans across multiple roof planes, it’s best to contact a licensed roofing contractor. Additionally, any evidence of water staining inside the attic or ceiling could indicate a deeper issue that cannot be resolved with surface shingle replacement alone. Professional roofers use specialized tools and years of experience to complete repairs safely and permanently. Attempting large-scale DIY roofing work may save money in the short term but can void warranties, compromise safety, and ultimately cost more in future repairs.

Conclusion

Replacing asphalt shingles may appear simple, but the process demands close attention to technique, materials, and weatherproofing methods. Mistakes such as tearing nearby shingles, skipping sealant, or forgetting to re-nail can shorten the life of your roof and leave it vulnerable to the elements. For small repairs, a careful and informed DIY approach can be effective. For anything beyond that, consulting a trusted roofing professional ensures the integrity of your home remains intact. Smart homeowners recognize when to step back and call in expert support, preserving both their investment and peace of mind.

Frequent Mistakes to Avoid During Asphalt Shingle Replacement Read More »

How to Identify and Repair Commercial Roof Leaks Before They Escalate

Commercial roof leaks pose a serious threat to business operations, building interiors, and structural integrity. When ignored or misdiagnosed, they lead to extensive water damage, mold growth, and costly repairs. Detecting leaks early and accurately is critical to maintaining commercial properties, yet many leaks remain elusive to inexperienced contractors. The key is not just patching visible symptoms, but locating the precise source of infiltration.

Why Commercial Roof Leaks Are So Often Missed

Commercial roofs are large, complex systems made up of multiple layers, penetrations, and drainage pathways. Water can travel long distances between the point of entry and where it finally reveals itself inside the building. That’s why a stained ceiling tile or interior drip often has nothing to do with the section of the roof directly above it. Untrained eyes may overlook minor punctures, degraded seals, or flashing separation, misdiagnosing the issue or applying temporary fixes that don’t last. This leads to repeat visits and mounting repair costs, all while the underlying problem worsens.

Common Causes of Commercial Roof Leaks

Several recurring issues lead to commercial roof leaks, especially on flat or low-slope systems. Over time, roofing membranes lose elasticity and become increasingly susceptible to cracking. Flashing around penetrations—like HVAC units, vents, skylights, and drains—can loosen over time. Ponding water from inadequate drainage systems accelerates material degradation. Inadequate maintenance, foot traffic damage, and poorly executed prior repairs compound the risk. Even small punctures, sometimes no wider than a pencil tip, can become entry points for water, especially when membranes are under stress from UV exposure or temperature fluctuations.

The Importance of Gathering Building History

Accurate leak detection starts before the contractor climbs the ladder. Understanding the building’s roofing history helps target potential problem zones. A professional inspection team will ask questions like: When was the roof installed or last replaced? Has it been maintained annually? Were there past repairs or known water issues? Have leaks worsened during specific seasons or storms? Gathering this context helps create an effective investigation plan and ensures that telltale signs aren’t dismissed or misread.

Proven Methods for Locating Hidden Leaks

The most reliable leak detection process involves a blend of visual inspection, moisture tracking, material probing, and system-level understanding. Inspectors should examine seams, penetrations, fasteners, edge details, drains, and rooftop equipment bases. Thermographic imaging or moisture meters may be used to pinpoint saturated insulation beneath the surface. Interior inspections, especially in ceilings and attic cavities, often reveal moisture trails. Drain systems are evaluated to ensure proper flow and no blockage. Leaks frequently occur at details rather than open fields, so precision is crucial. Finding the source requires patience, persistence, and often getting hands-on in less obvious areas.

What a Thorough Leak Inspection Should Include

A professional commercial roof leak inspection includes a full walk-through of the exterior surface, review of vulnerable areas like flashing, and interior examination where stains or drips appear. The contractor should provide documented findings, photographs of problem areas, and a plan for resolution. In many cases, roofers will identify not only the current issue, but emerging threats like seam separation, UV damage, or inadequate drainage that could lead to future leaks. A quality inspection should result in a comprehensive diagnosis—not just a sales pitch for full replacement.

Why Many Roofers Fail to Identify the Real Problem

It’s not uncommon for a commercial roof to be inspected by multiple contractors before the actual problem is correctly identified. Many crews rely on surface-level evaluations and overlook small but critical details. Others may push premature replacement when a targeted repair would suffice. Experienced inspectors understand how commercial roof systems behave over time and how water moves beneath membranes or through substrate layers. It’s this attention to detail and willingness to look beyond the obvious that sets professionals apart from average roofing technicians.

Case Study: A Leak Only a Third Roofer Could Find

In a recent inspection of an EPDM commercial roof, multiple contractors failed to identify the source of a persistent leak. Water stains appeared during heavy rains, but prior inspections reported no visible membrane damage. Upon investigation, the third inspector identified subtle degradation at a pipe penetration—cracked caulking and minor seam separation, hidden beneath equipment flashing. With careful hands-on inspection, the leak was pinpointed and successfully repaired. This case highlights how skill, patience, and experience lead to solutions when others fall short.

Preventing Future Leaks With Scheduled Maintenance

Leak prevention starts with proactive inspections and proper maintenance. It’s recommended to inspect commercial roofs biannually—usually in the spring and fall—and following any significant weather events. Regular inspections help detect early membrane stress, ponding issues, clogged drains, and wear near rooftop units. Addressing these problems before they develop into full leaks reduces emergency repairs, tenant disruptions, and interior damage. Maintenance contracts with trusted roofing professionals ensure your investment remains protected over time.

Partnering With Experienced Commercial Roofing Experts

Not all roofers are equipped to handle commercial leak diagnostics. Flat roofing systems such as EPDM, TPO, PVC, and modified bitumen each have their own failure points and behaviors. A skilled contractor understands these nuances, and more importantly, approaches every inspection with a methodical mindset and commitment to finding the root cause—not just surface damage. Tried and True Roofing in Denver, CO offers in-depth commercial roof leak detection services backed by years of experience with complex systems and storm-damaged properties. Their ability to identify even the most inconspicuous failures has earned the trust of property managers and facility owners across the region.

Conclusion

Finding and fixing a commercial roof leak is not about quick patchwork or guesswork. It requires an investigative mindset, technical skill, and a deep understanding of roofing systems. While many leaks are misdiagnosed or overlooked entirely, a thorough inspection conducted by experienced professionals will uncover the source, stop the damage, and extend the life of the roof. Investing in the right team today protects your building, your budget, and your peace of mind for years to come.

How to Identify and Repair Commercial Roof Leaks Before They Escalate Read More »

What You Should Know About Roof Inspection Costs and Expectations

Knowing the true condition of your roof isn’t just good practice—it’s essential to protect your investment. Scheduling a professional inspection can prevent unexpected repair bills, reveal hidden damage, and offer peace of mind. While many homeowners are unsure about the cost of this service, we believe in providing complete clarity on what to expect before you make that call.

How Much Should You Budget for a Roof Inspection?

The price of a roof inspection usually falls between $100 and $400, depending on several factors such as roof complexity, accessibility, and the methods used. Simpler, low-pitch roofs often fall at the lower end of that range, while steep or multi-story properties may be more time-intensive, thus more expensive. However, many roofing companies choose to offer complimentary inspections, especially when looking to establish a working relationship with homeowners. When an inspection is offered at no cost, it’s often limited to a basic overview unless otherwise specified. A detailed report, drone usage, or thermal scans may still come with additional charges, which should be clarified in advance.

Why the Cost Varies from One Home to Another

No two roofing systems are exactly alike, and pricing reflects that. A small, one-level residence with asphalt shingles may be inspected quickly and with minimal equipment. In contrast, properties with complex architecture, solar panels, skylights, or slate roofing may require more time, additional safety measures, and possibly specialized inspection tools. Accessibility is another pricing factor. If the roof is high, steep, or obstructed by landscaping or structures, it may take more effort and equipment to inspect properly, which adds to the overall cost. The inspection method itself also affects pricing. Traditional inspections done on foot are the standard and most affordable. Drone-based assessments or moisture detection with thermal cameras come at a premium due to the advanced technology and expertise involved.

Free Inspections: What’s the Catch?

Some companies provide free inspections as a marketing strategy to generate leads, which is common in competitive areas. While these inspections can be helpful, they’re not all created equal. A reputable contractor offering a complimentary assessment will still take the time to explain their findings, provide images, and respect your decision-making process. Others may use a free inspection as a chance to push sales aggressively. It’s important to ask what’s included, whether you’ll receive documentation, and if the company will pressure you into immediate repairs. A truly beneficial inspection, whether paid or not, should leave you better informed without obligation or urgency.

What’s Included in a Standard Roofing Inspection?

A thorough inspection should evaluate both exterior and interior roofing elements. Externally, it should cover shingle condition, flashing integrity, gutter systems, roof penetrations, valleys, and any signs of sagging or water damage. Internally, the attic space should be reviewed for insulation issues, moisture buildup, mold, or structural weakness. You should receive a clear summary outlining any concerns, potential repair needs, and suggested timelines. Some contractors will include photographs, measurements, and estimates. While this level of detail may not always be free, it can be worth the cost for homeowners looking to make confident, long-term decisions about their property.

When a Paid Inspection Makes Sense

While free inspections offer excellent value in many cases, there are times when a paid evaluation is a better fit. If you’re preparing to buy or sell a home, insurers and lenders may require a report from a certified inspector. In cases of suspected storm damage, water intrusion, or structural failure, it’s best to hire an independent professional who provides a detailed, unbiased analysis. Paying for this service can also be beneficial if you’ve received conflicting opinions or want a second set of eyes before committing to a major repair or full roof replacement.

When and How Often to Inspect Your Roof

Most roofing systems benefit from at least one inspection per year. If your home is located in a region prone to hail, snow, or strong wind, you may want to increase the frequency—especially following major weather events. Routine evaluations help catch problems early and extend the service life of your roof. Homeowners with roofs older than ten years should be particularly diligent. Even when no damage is visible from the ground, issues such as flashing separation or underlayment failure can occur silently and grow worse over time.

What to Ask Before Booking an Inspection

Before you schedule, ask the contractor the following: Is there a cost involved or is the inspection free? Will I receive a written report or images? Is the person conducting the inspection licensed and insured? How soon can the inspection be done, and how long will it take? Will you recommend repairs only when necessary, or suggest replacement automatically? These questions help set expectations and ensure you’re working with someone professional, experienced, and customer-focused.

Avoiding Costly Surprises Through Preventive Action

Annual inspections not only give insight into your roof’s condition, they help you plan financially. Addressing small repairs early often prevents more expensive problems from developing. For instance, catching a loose vent or minor leak before winter can prevent major water damage and mold growth. Inspections also strengthen your insurance position. In the event of a claim, having a documented roof history can support your case and speed up the approval process.

The Denver Homeowner’s Perspective

In climates with heavy snowfall, hail, and high UV exposure like Denver, roofing systems are subjected to ongoing stress. Fluctuating temperatures and freeze-thaw cycles wear down materials faster than in milder regions. That’s why inspections are especially valuable here—not just as a preventive tool, but as part of responsible homeownership. Contractors in this region understand the unique challenges roofs face and are equipped to identify weather-related issues early. Tried and True Roofing, serving the Denver area, offers detailed inspections that account for these environmental factors, helping homeowners plan repairs based on actual need, not guesswork.

Conclusion

A roof inspection offers clarity, security, and insight. Whether it’s a free visual overview or a paid detailed analysis, the service exists to protect your home and your wallet. Knowing the expected cost, asking the right questions, and working with a trustworthy contractor ensures the process is smooth, transparent, and beneficial. Inspections are not just for emergencies—they’re a critical step in keeping your home in top shape year-round.

What You Should Know About Roof Inspection Costs and Expectations Read More »